Practical advice
How to install a bird-box camera safely
Test, focus and route a bird-box camera while the box is empty, then leave the complete installation alone once birds arrive.
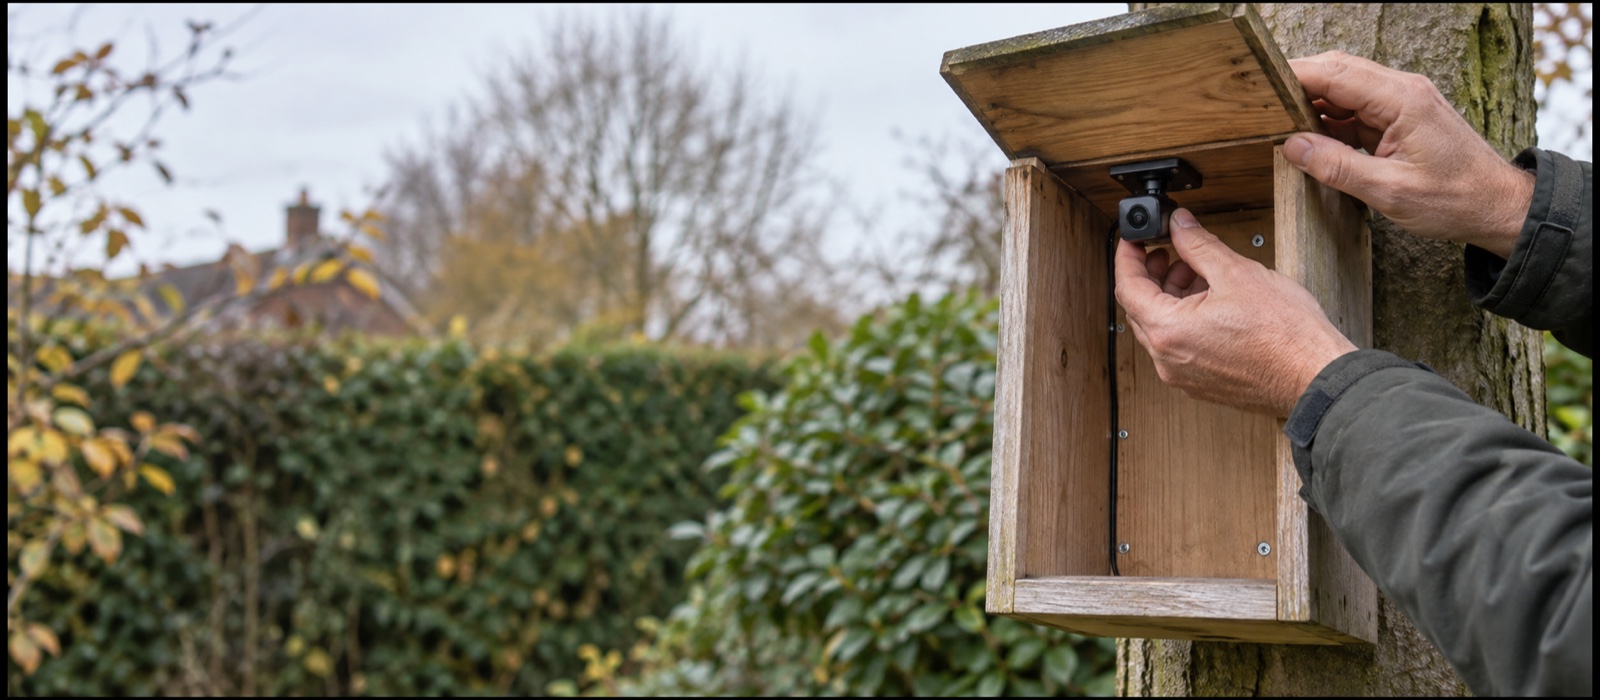
Use a camera and mounting position designed for the confined box interior.
Focus and test with a temporary object at nest height, then remove it.
Finish installation before occupation and never reopen an active box for the picture.
A bird-box camera should be installed as one complete, tested system while the box is empty. The work includes more than screwing a lens beneath the roof: you need the right close-focus view, a safe power or network route, a dry connection and a screen that already works before the box is mounted.
Autumn and winter are usually the most forgiving practical window. If birds have started bringing nesting material, do not open the box. Postpone the camera until the nesting attempt is over and the box is certainly empty.
1. Check that the camera and box belong together
Use a purpose-built bird-box camera, not a security camera or trail camera. The lens must focus at the short distance between roof and floor, and the body must fit without obstructing the entrance, ventilation or the birds' usable space.
Look inside the empty box for a mounting block or pre-drilled camera position. A complete box-and-camera kit removes much of this uncertainty. With a retrofit, follow both manufacturers' instructions and do not drill through a thin roof where water can track inside.
2. Assemble it on a table first
Green Feathers' current support guidance recommends getting the system working before it is mounted. Connect the camera to its power supply, receiver, network equipment or app indoors. Remove any lens cap. Check that the live picture is stable, the night mode changes as expected and the correct camera generation appears in the correct app.
If recording is important, insert and format only a supported memory card. Make a short recording and play it back. For a direct-TV system, check the television input; an older analogue camera may need a powered AV-to-HDMI converter on a modern set.
3. Set the view and focus in the empty box
Temporarily place a small neutral object where the top of a nest is likely to be, then close the roof and view the picture. Rotate the lens only as the manual permits until that distance is sharp. Aim for the centre and entrance area without filling half the frame with a side wall.
Check both daylight and infrared pictures. Some internal wood can reflect infrared and create a bright patch; a slight camera adjustment may help. Do not paint the interior or add improvised lighting. Remove the test object, tools, packaging and every loose shaving when finished.
4. Plan power, data and drip loops
Measure the real cable path from the box to the protected indoor connection. Follow walls and safe edges rather than taking a straight line across a path. Low-voltage cable should be clipped without crushing it, protected from mower and strimmer routes, and kept away from sharp metal edges.
Before a connection or entry point, form a downward drip loop so water falls away rather than following the cable indoors. Keep mains plugs and unsuitable adapters inside. If using PoE, confirm the injector, cable and network equipment are compatible. If using solar, place the panel in useful light without moving the box into hot direct sun.
5. Test the exact outdoor position
Wi-Fi must be tested where the box will actually hang. A 2.4GHz signal can reach farther than 5GHz, but masonry, metal, wet leaves and distance still reduce it. Hold the powered camera at the planned location and watch for a stable live feed—not just one signal bar.
For an analogue wireless system, check for interference. For a wired system, confirm the supplied cable reaches with slack for a drip loop and maintenance. Never solve a short lead with an indoor extension joint exposed to rain.
6. Mount the box and secure everything
Choose the bird-safe position first: sheltered from strong sun and prevailing rain, with a clear approach and secure fixings. Our guide to where to put a nest box covers the differences between small-hole, robin, sparrow and swift boxes.
Fix the box so it cannot swing. Route the camera cable down the rear where birds cannot pull it and wind cannot tap it against the timber. Secure a solar panel independently; its weight and wind load should not twist the box. At height or on masonry, use competent help and appropriate access equipment.
7. Complete a final remote check
With the lid secured, check focus, time and date, night mode, recording, notifications and live viewing from the place you will normally watch. Restart the system once to ensure it reconnects without physical intervention. Label indoor cables so they are not accidentally unplugged.
Then stop handling the box. Repeated “final adjustments” defeat the purpose of a remote camera. If the picture is not perfect but remains useful, accept it for the season.
Once birds show interest, leave it alone
The GOV.UK filming guidance advises installing remote cameras while animals are away from nests or resting places. Wild bird nests and eggs are protected; Schedule 1 species also have specific disturbance protection.
If a bird is carrying material, sitting, laying, incubating or feeding young, do not open the box to clean the lens, restore power, replace a card or change the angle. Use our responsible viewing guide and wait until the nesting attempt has finished.
Frequently asked questions
How high should the camera sit?
Use the box or camera manufacturer's mount. It should cover the expected nest area while remaining clear of the entrance and birds. Focus matters more than an arbitrary height.
Can the cable come through the entrance?
No. It could obstruct birds and expose the box to water. Use the designed rear or roof route and seal it only as the manufacturer specifies.
What if the Wi-Fi drops after nesting starts?
Leave the occupied box alone. Troubleshoot the router, app and indoor equipment first; if the camera itself needs access, wait until the box is no longer in use.